Create and Schedule a Campaign
The manual Campaign Scheduler helps you launch a campaign by selecting the base campaign, audience, channels, templates, schedules, and timezone. Use this flow when you already know the audience and channel plan, or when you want direct control over every setup step.
Before you start
Confirm these items before opening Campaign Scheduler:
- A campaign exists, or you have an App stream available so you can create one.
- A target audience exists.
- Templates exist for each channel you plan to use.
- The workspace timezone is correct, or you know which timezone to select.
- The campaign date range and success metric are approved.
- Channel consent and suppression rules are reviewed.
Open the scheduler
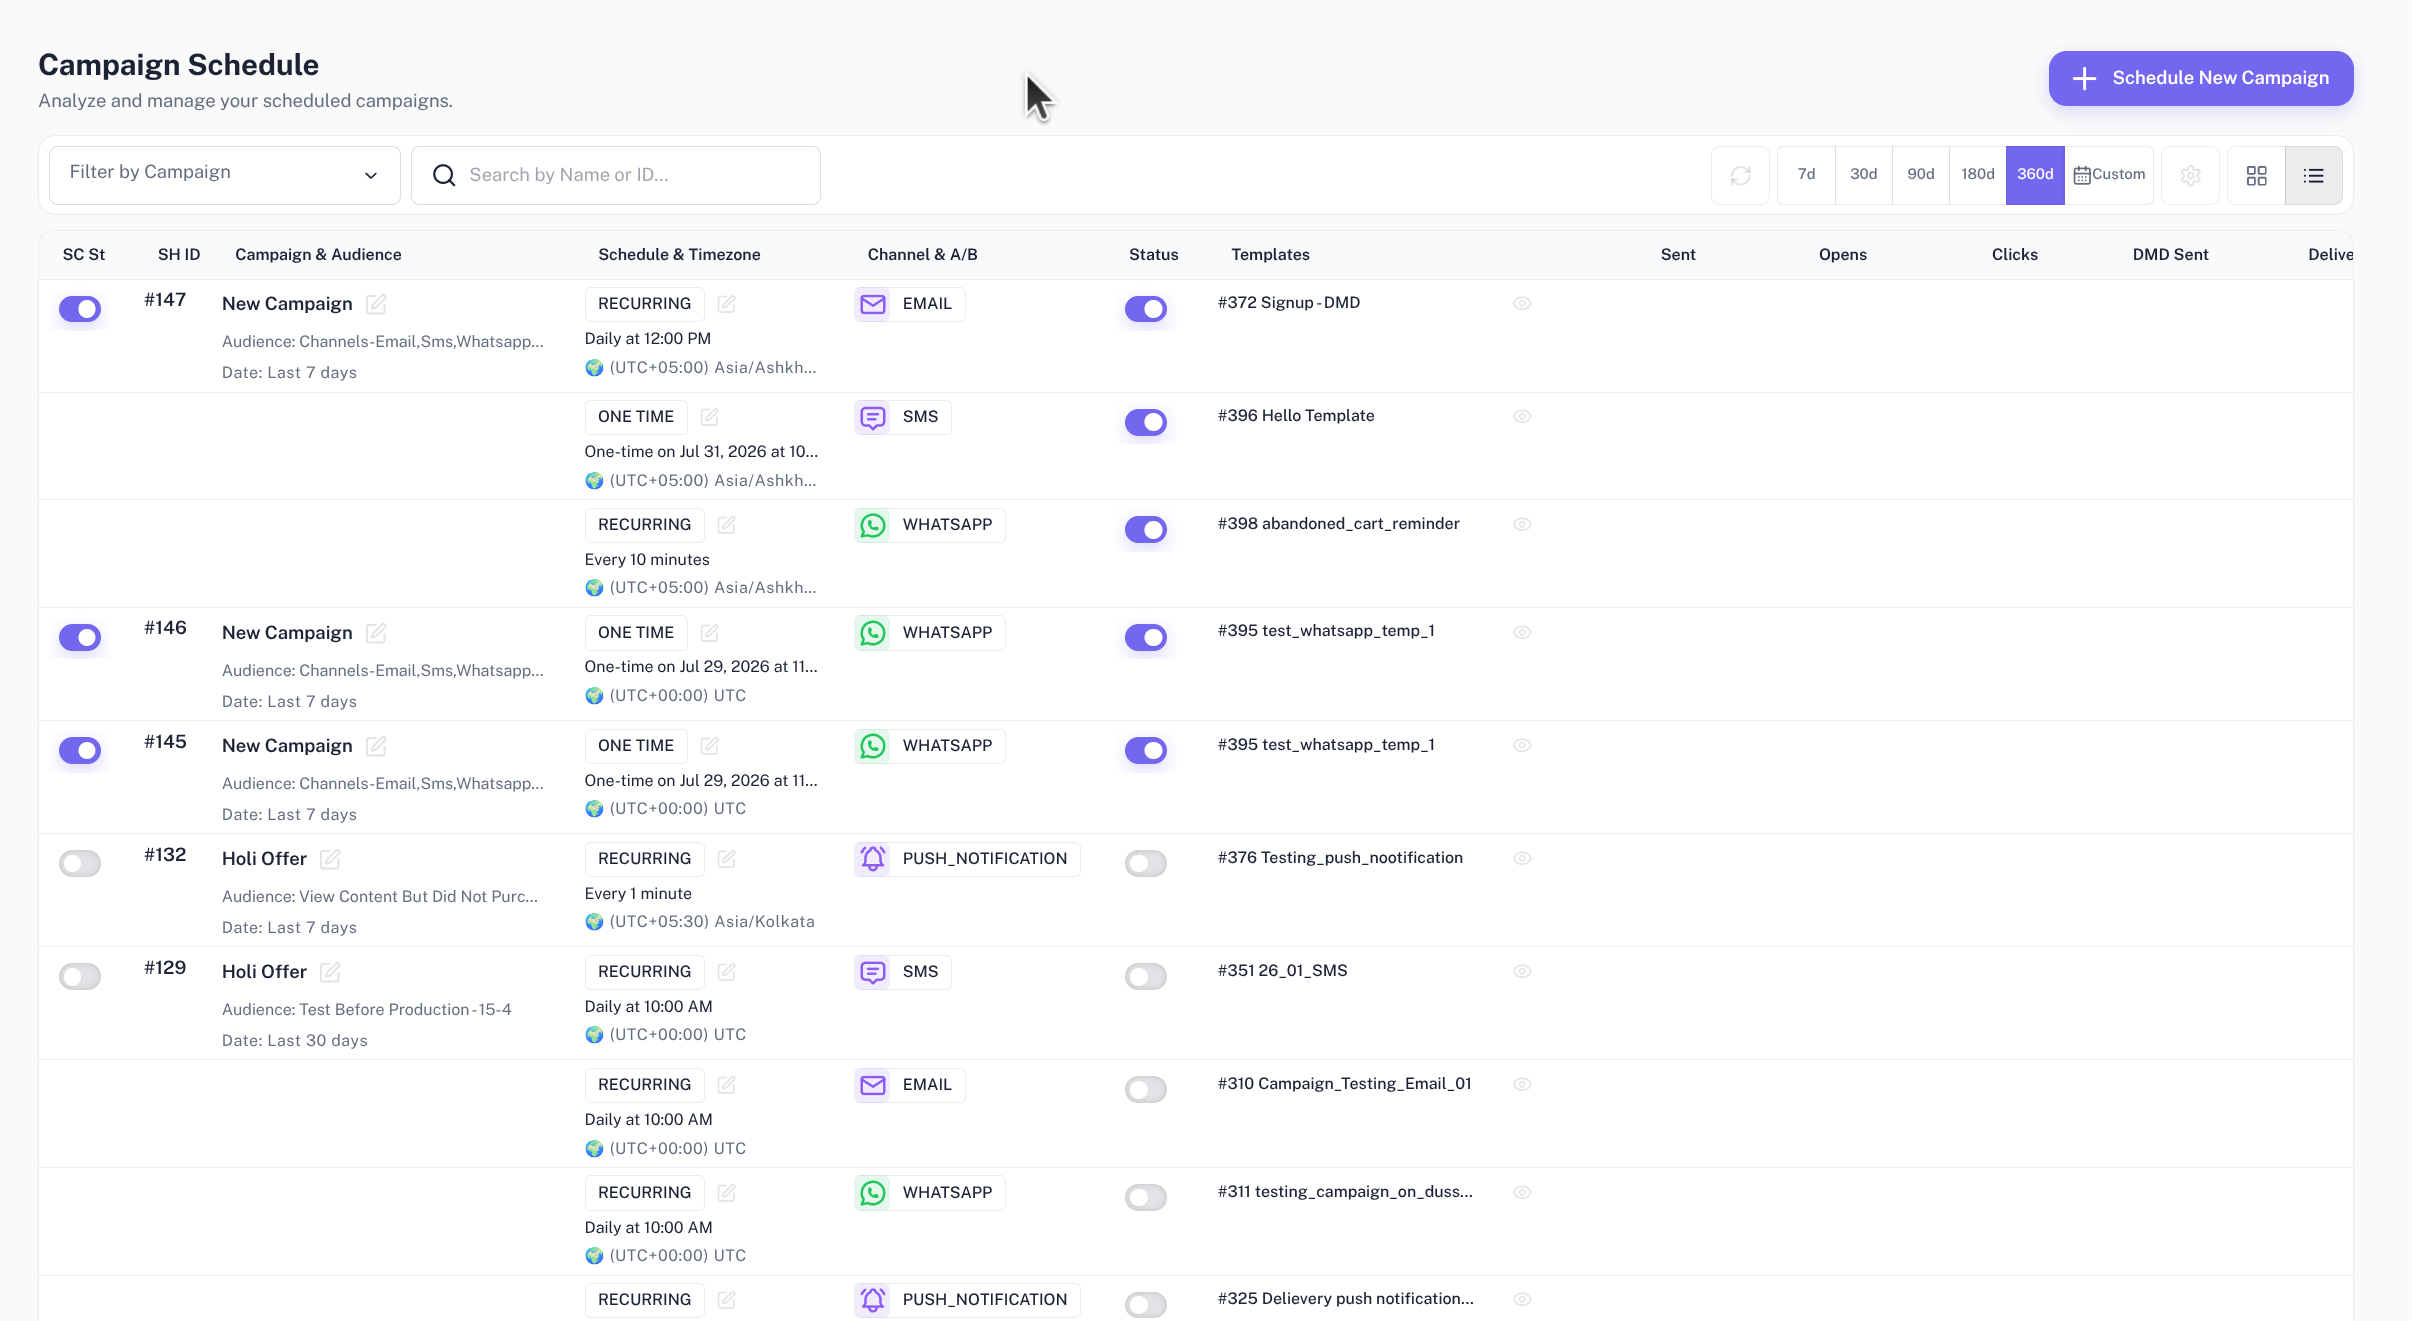
- Open Campaign Schedule.
- Select Schedule New Campaign.
- Review the six-step Campaign Scheduler flow.
The manual flow includes these steps:
| Step | Purpose |
|---|---|
| Select Campaign | Choose an existing campaign or create a new campaign record |
| Select Audience | Choose audience and audience date range |
| Select Channels | Choose SMS, Email, WhatsApp, or Push Notification |
| Select Templates | Assign templates and optional A/B tests per channel |
| Scheduler | Choose timezone and per-channel schedule |
| Review & Finish | Review campaign setup and launch |
Step 1: Select Campaign
Use Select Campaign to choose the campaign you want to schedule.
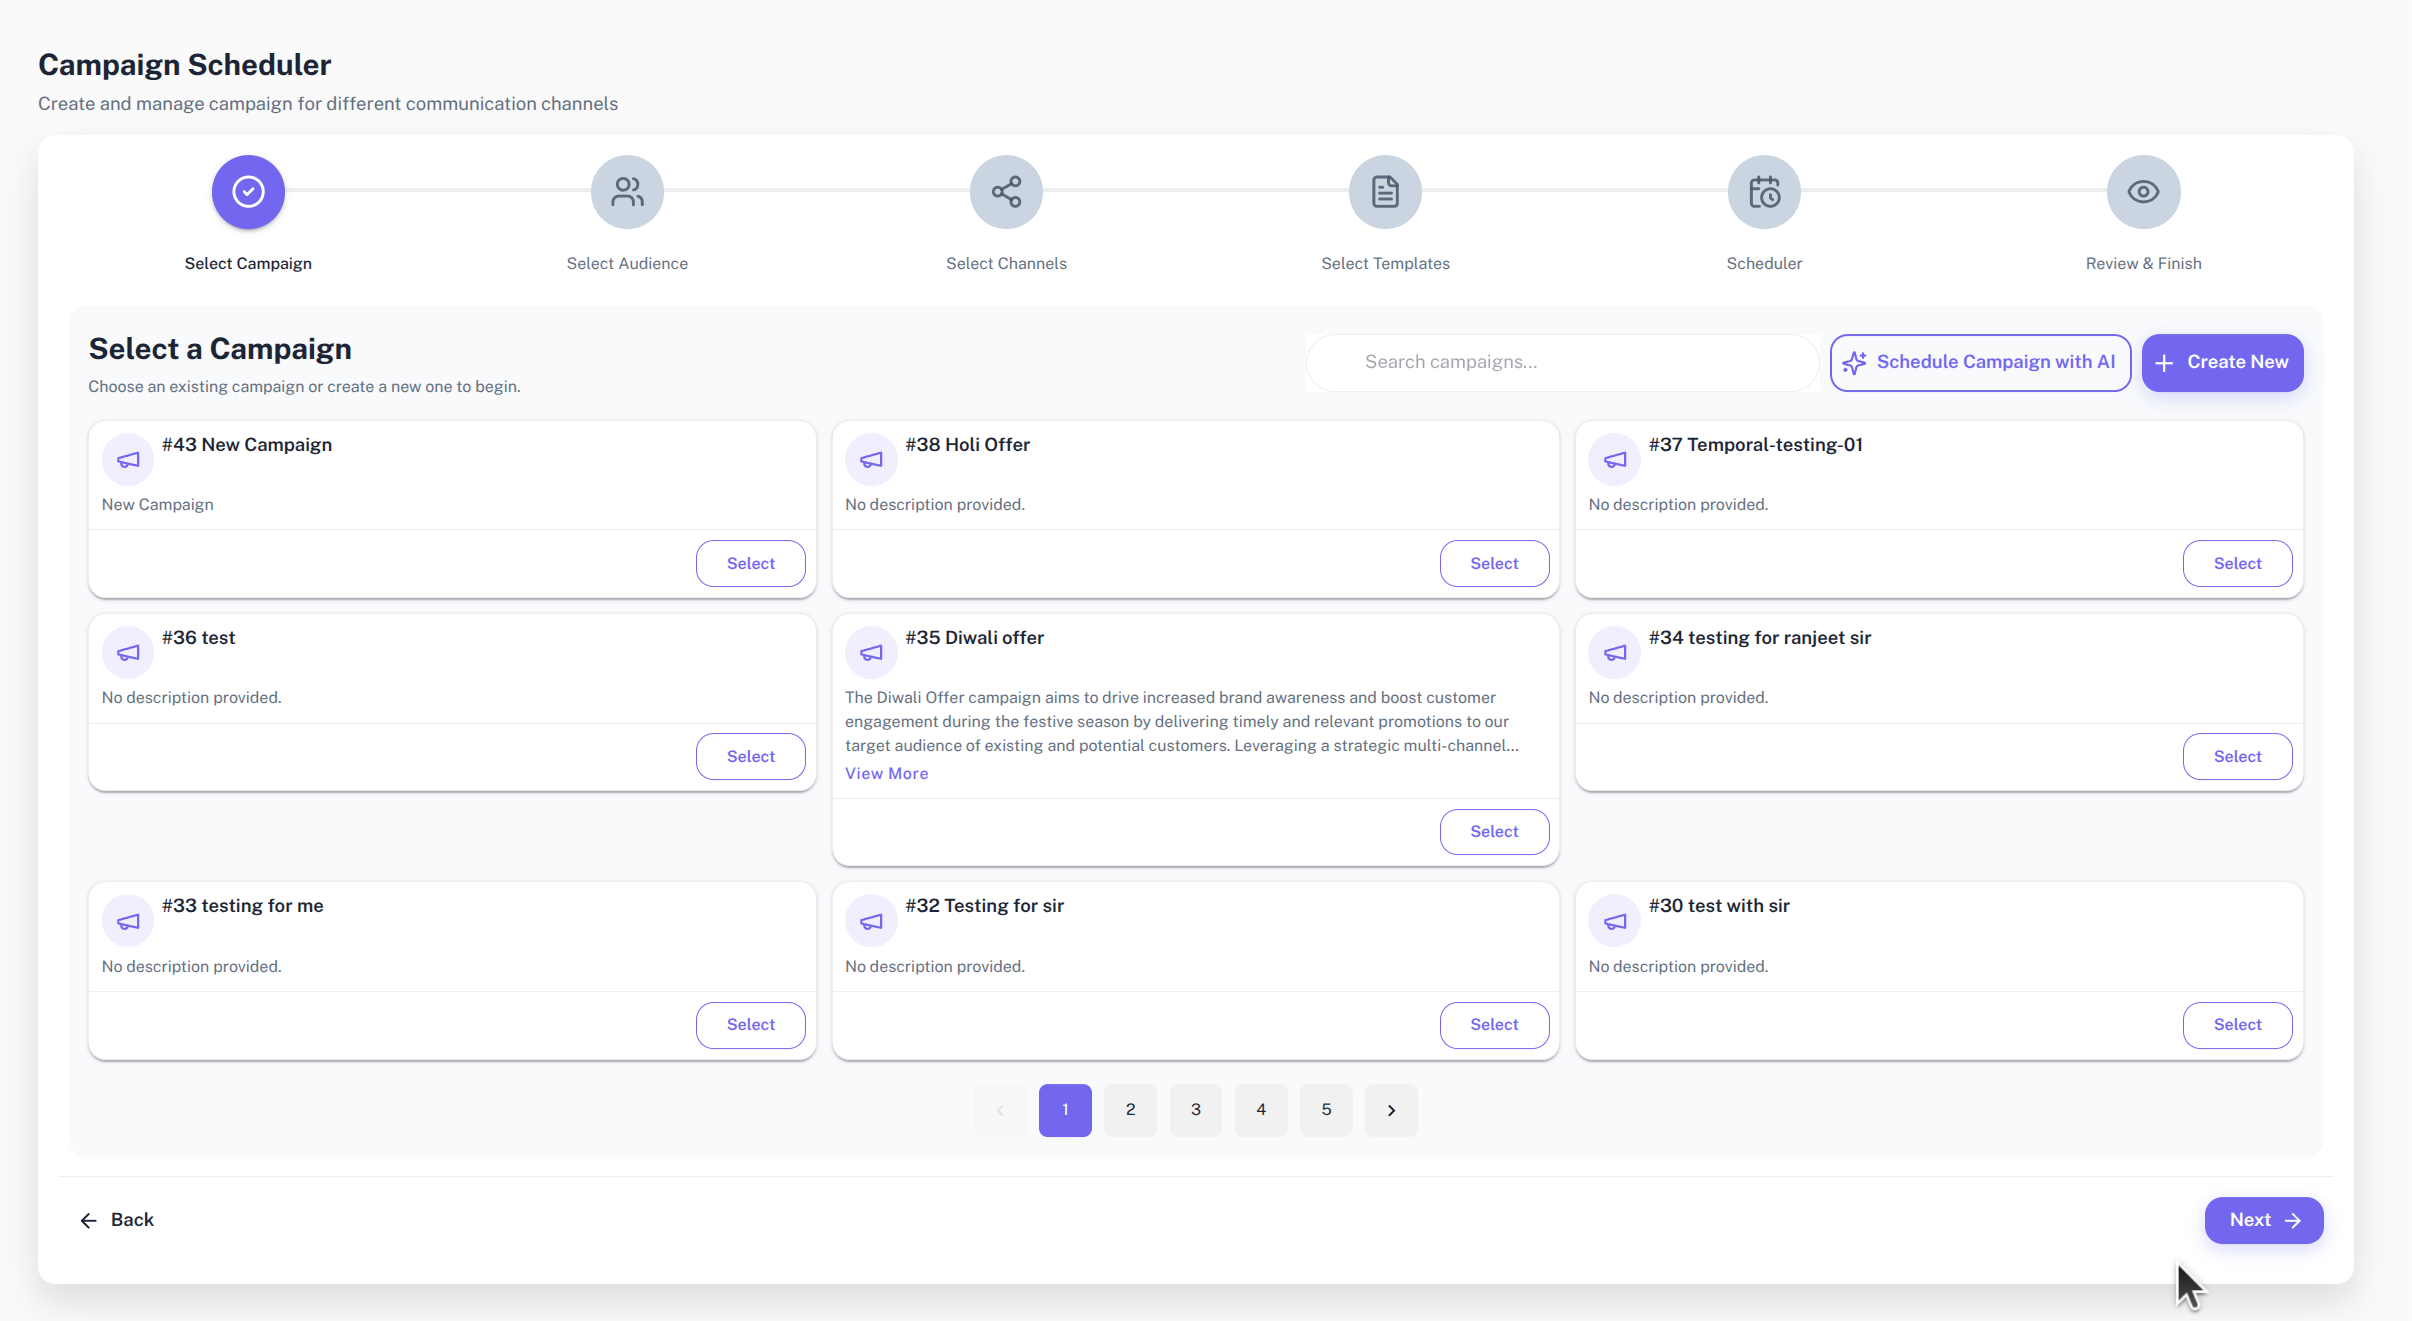
You can:
- Search campaigns with Search campaigns....
- Select an existing campaign card.
- Select Create New to create a campaign record.
- Select Schedule Campaign with AI to switch to the AI-assisted flow.
Selecting an existing campaign advances to the next step.
Create a new campaign record
Use Create New when the campaign record does not exist yet.
In Create a New Campaign, complete:
- Campaign Name.
- Description (Optional).
- App stream.
The campaign name and App stream are required. Use Generate AI Description if you want DriveMetaData to draft a description from the campaign name.
After creating the campaign record, return to Select Campaign and select the campaign before continuing.
Step 2: Select Audience
Use Select Target Audience to choose the audience and date range for the campaign.
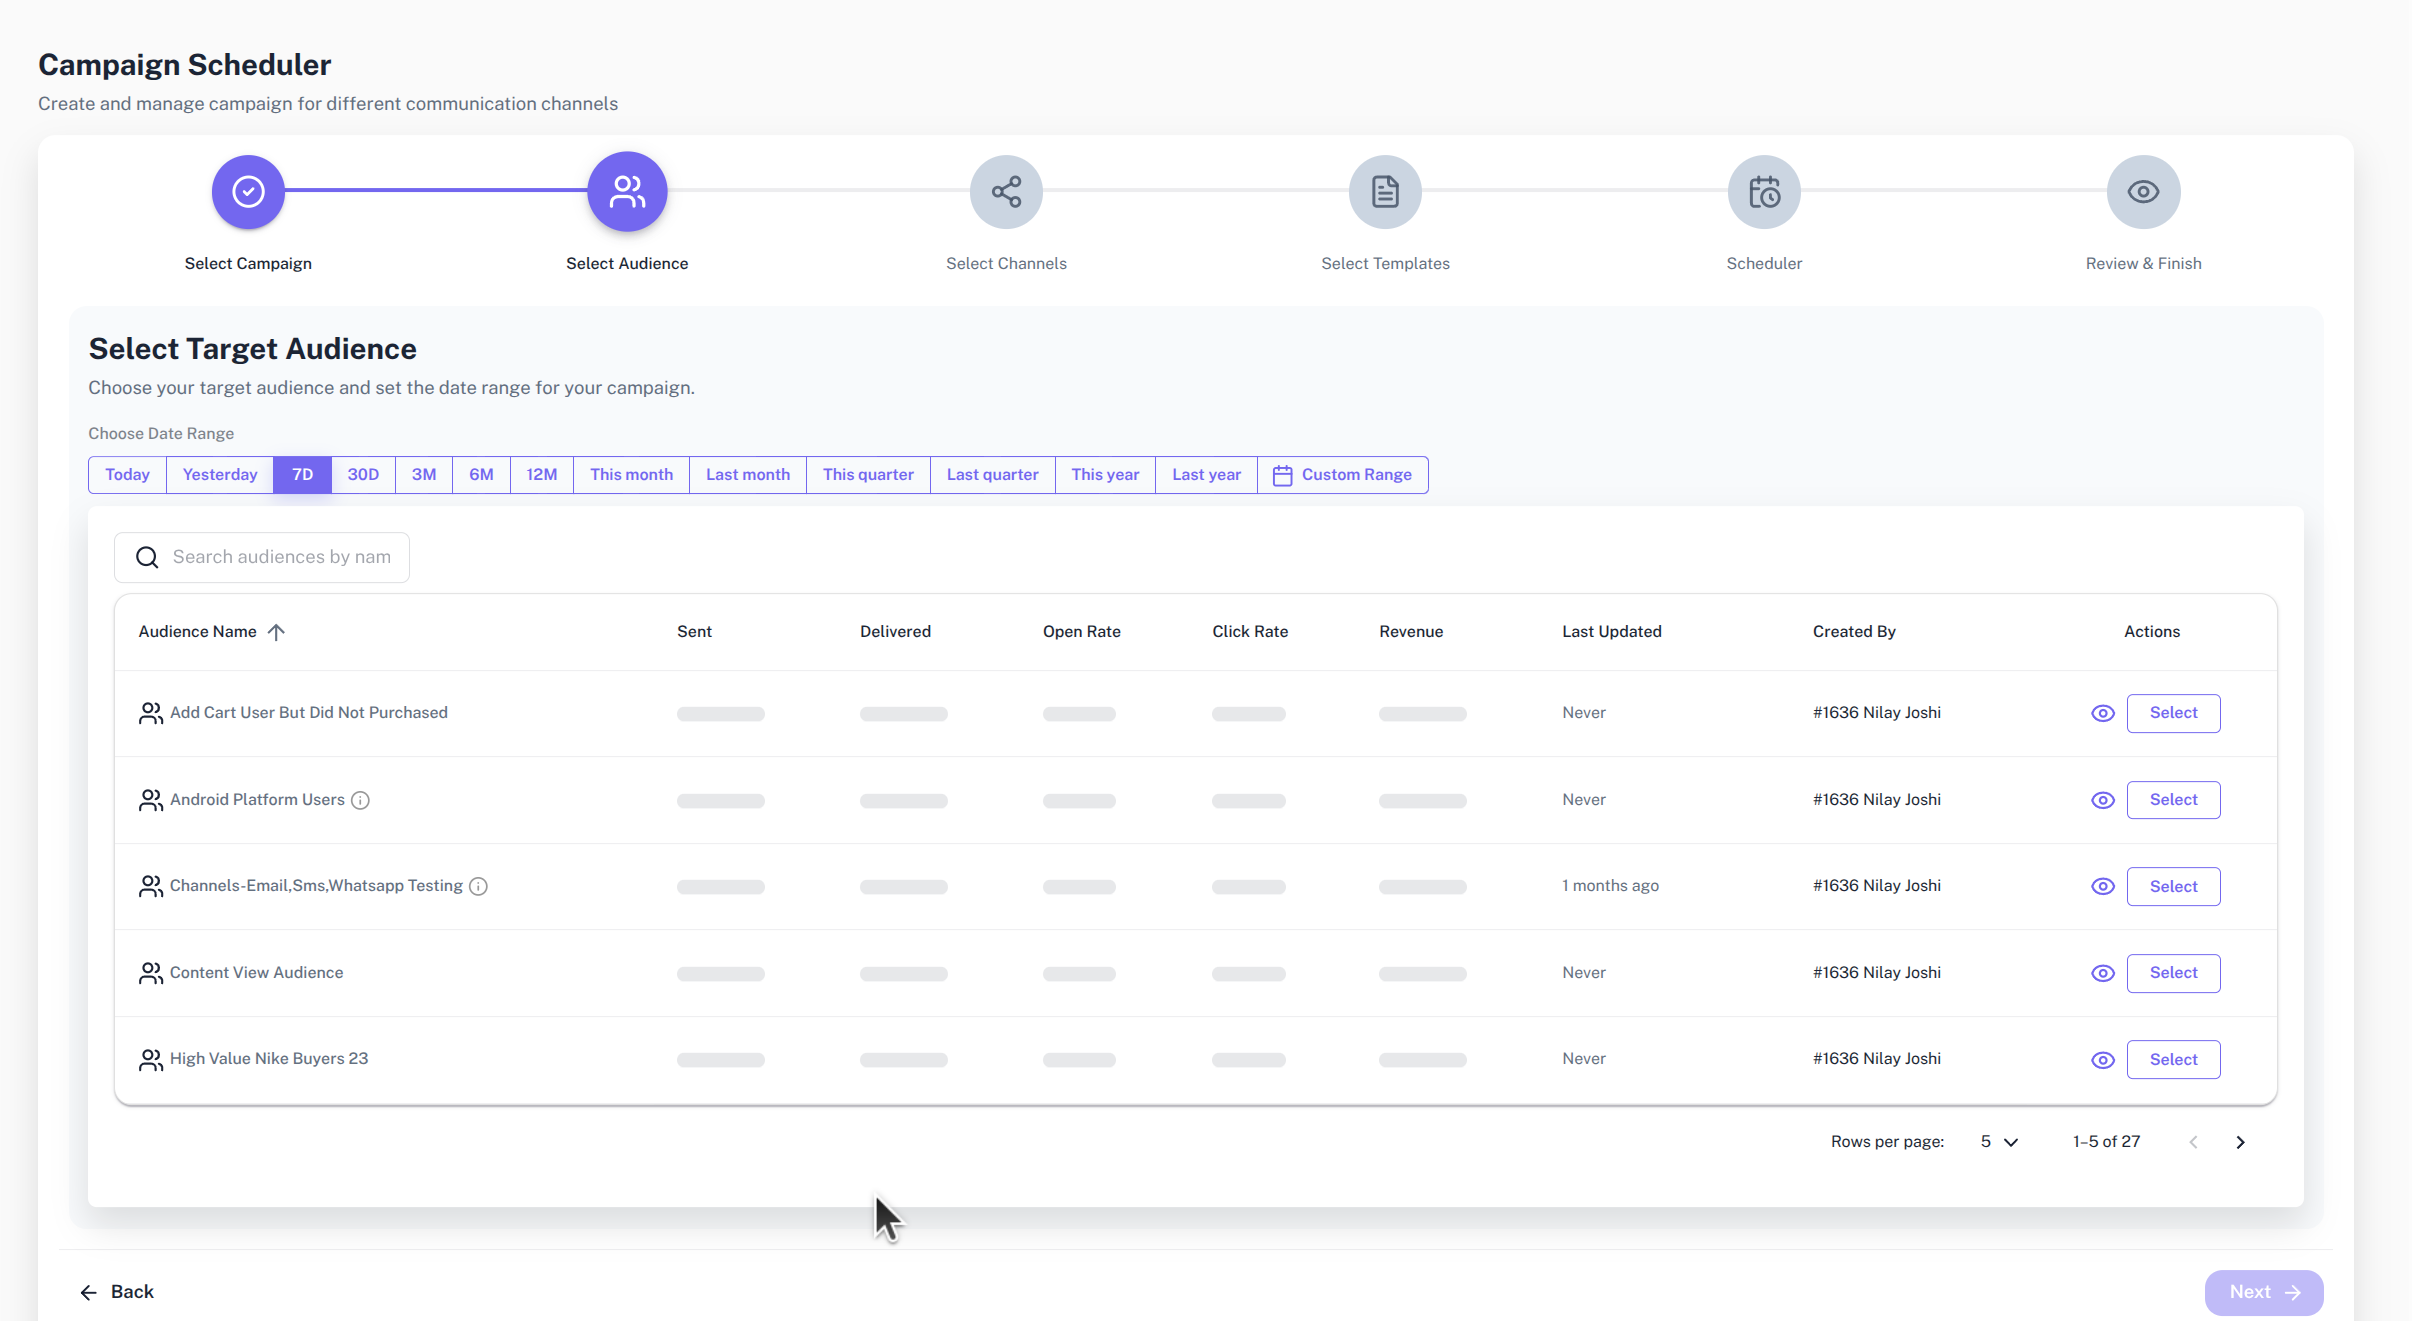
- Choose a date range.
- Search audiences if needed.
- Review audience performance columns.
- Select the audience row or Select button.
- Use Preview Audience when you need more audience details.
Date range options include presets such as Today, Yesterday, 7D, 30D, 3M, 6M, 12M, This month, Last month, This quarter, Last quarter, This year, and Last year. Use Custom Range when the audience window needs specific From and To dates.
Audience analytics are helpful for review but are not required to select an audience. If analytics are unavailable, you can still continue after selecting an audience.
Step 3: Select Channels
Use Select Your Channels to choose how the campaign should reach the audience.
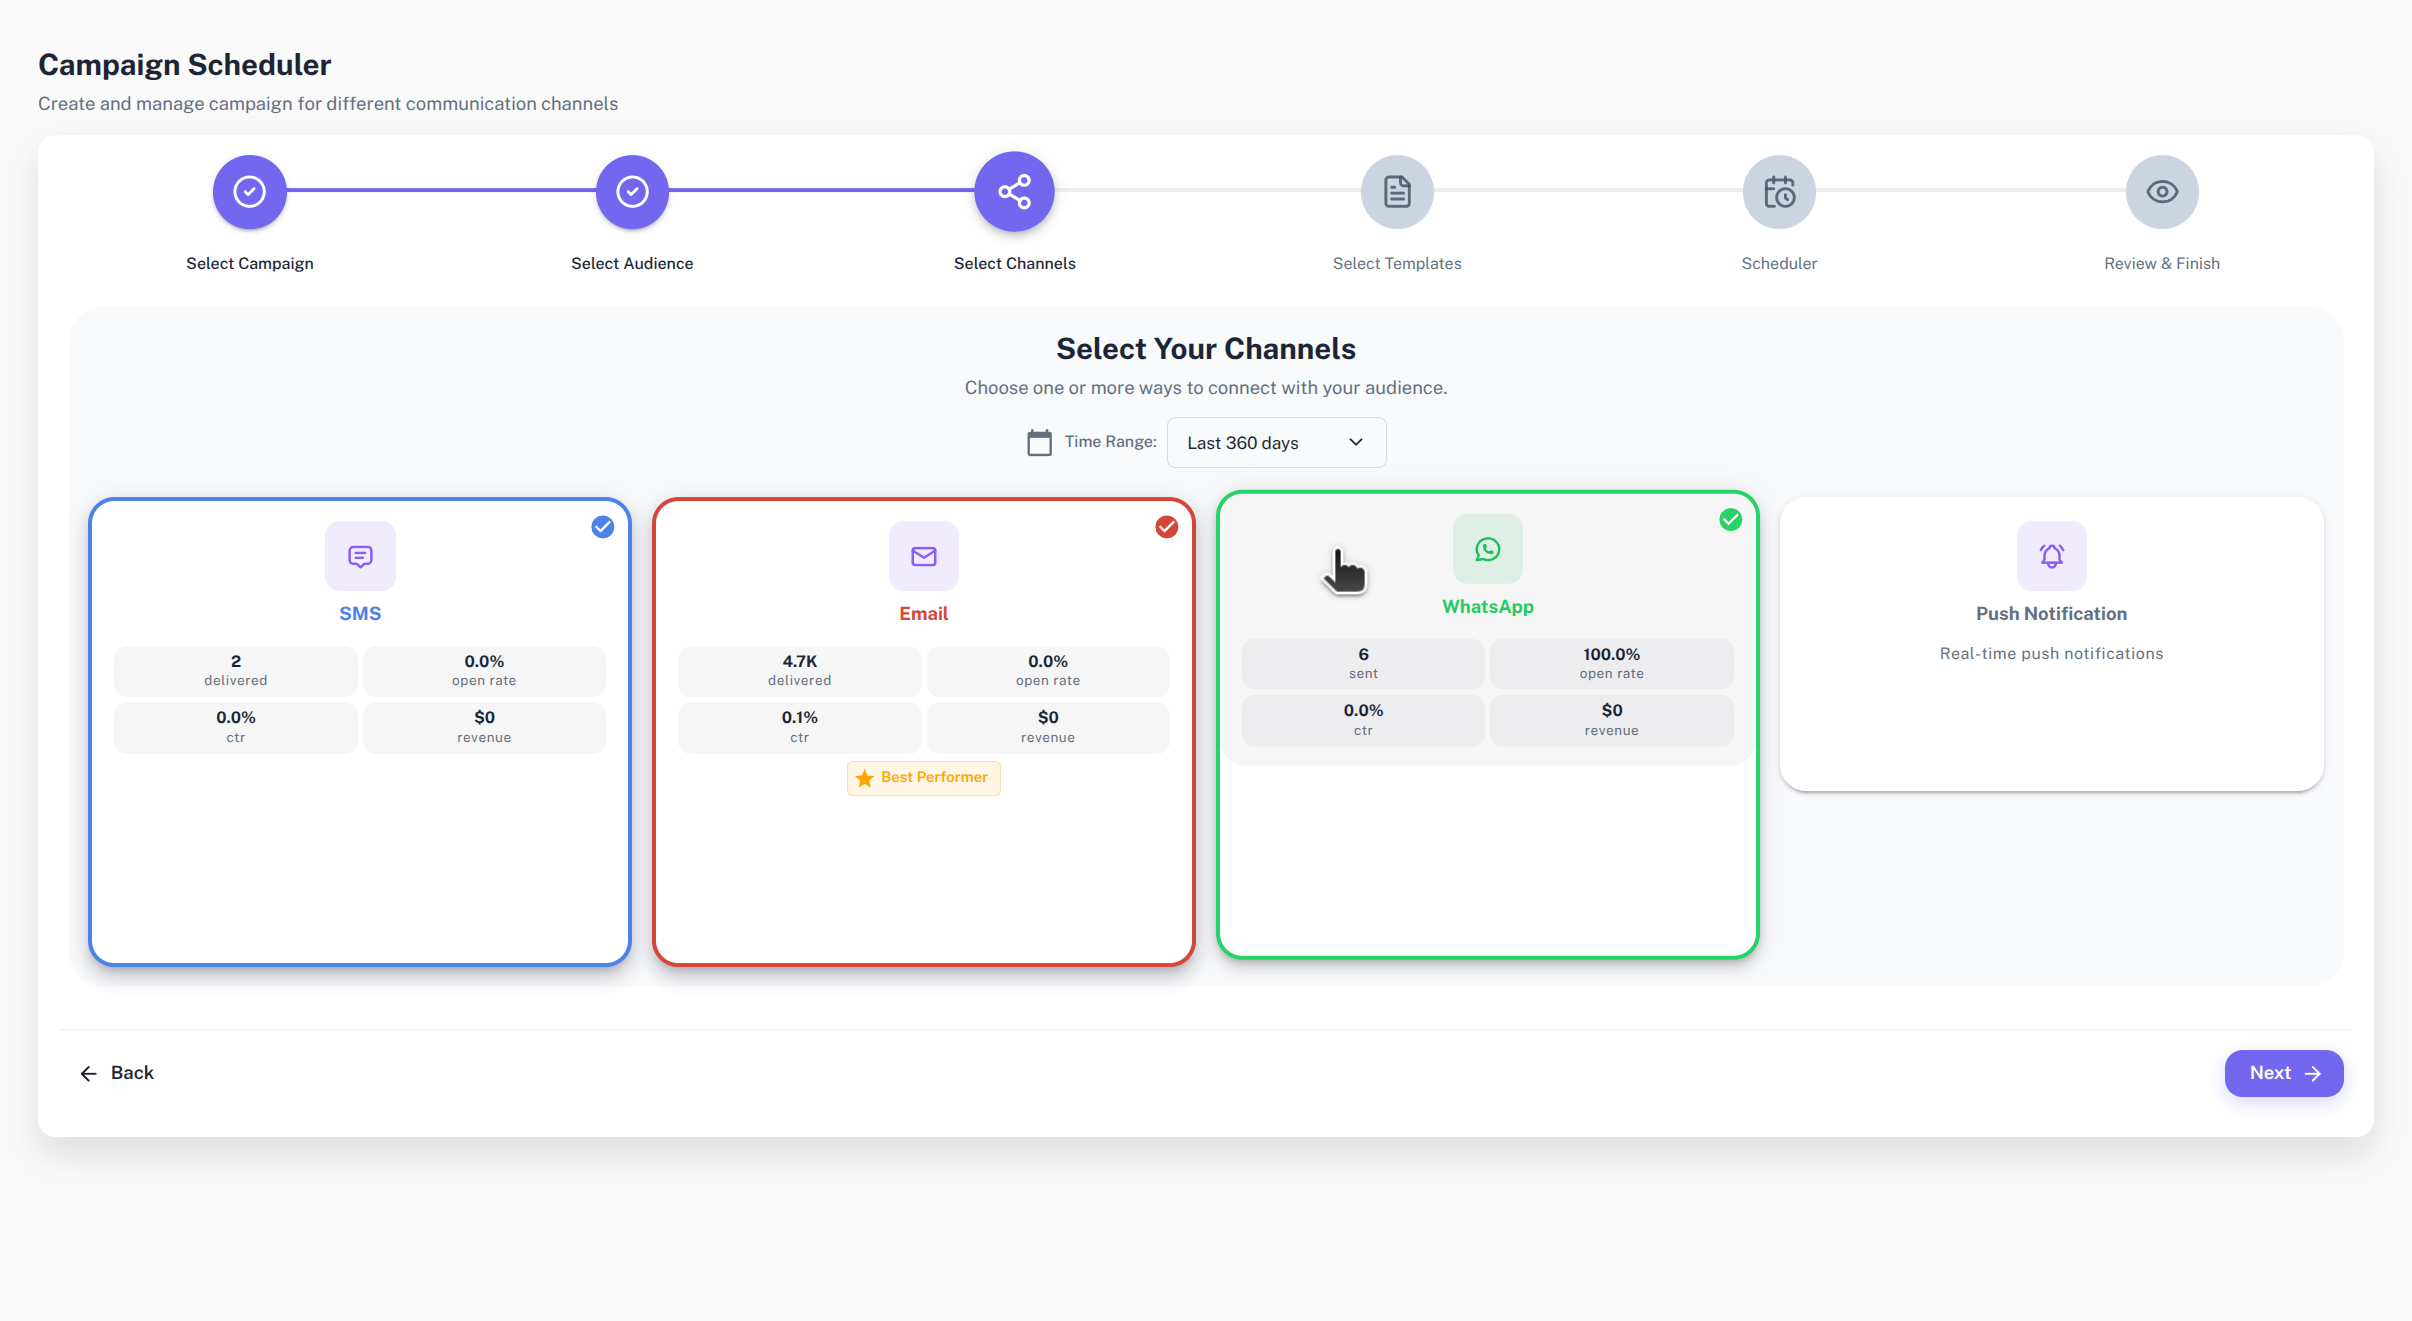
Supported manual scheduler channels are:
- SMS.
- Email.
- WhatsApp.
- Push Notification.
SMS, Email, and WhatsApp can show channel performance metrics. Push Notification can be selected even when channel performance metrics are not shown in this step.
Select at least one channel before continuing.
Step 4: Select Templates
Use Select Templates to assign templates to every selected channel.
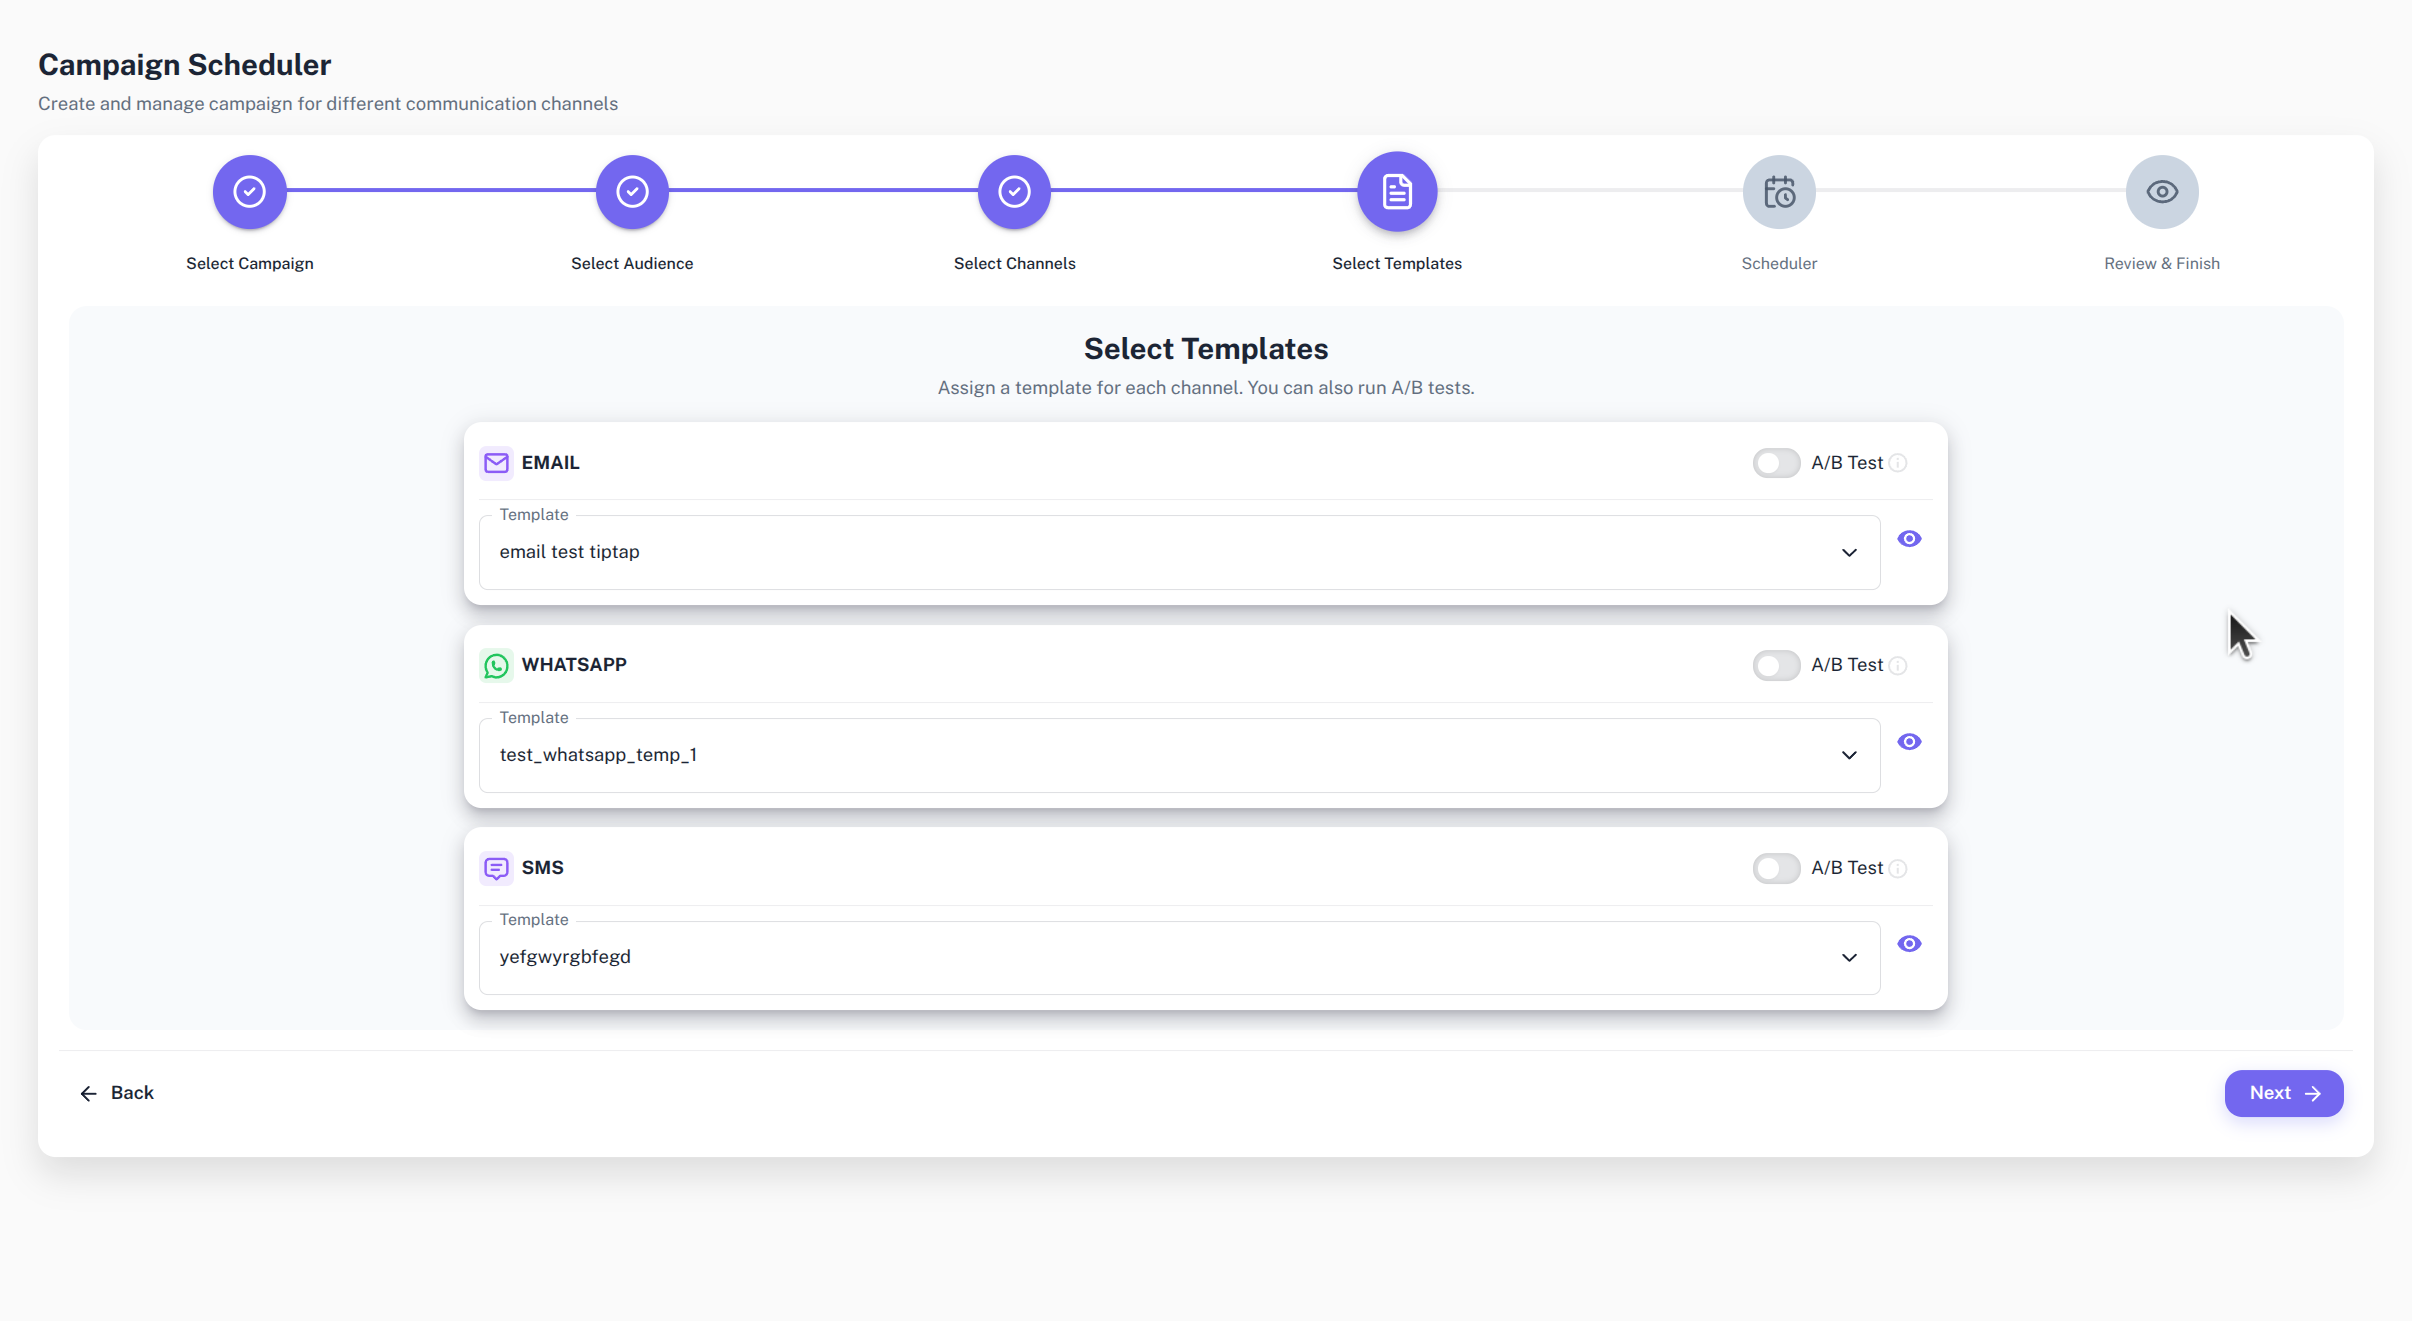
For each selected channel:
- Choose a template from the Template field.
- Use the preview action to check the message.
- Turn on A/B Test only when you want to compare multiple variations.
- If A/B testing is enabled, choose at least Variation A and Variation B.
The scheduler requires at least one template for every selected channel. A/B tests require at least two filled variations.
Preview templates before scheduling. Template review catches wrong copy, wrong creative, and channel mismatch issues before launch.
Step 5: Set a schedule
Use Set a Schedule to choose the campaign timezone and delivery timing for each selected channel.
First select Campaign Timezone. The scheduler tries to auto-detect the workspace timezone, but you can choose a timezone manually from Select Timezone.
Then configure every selected channel.
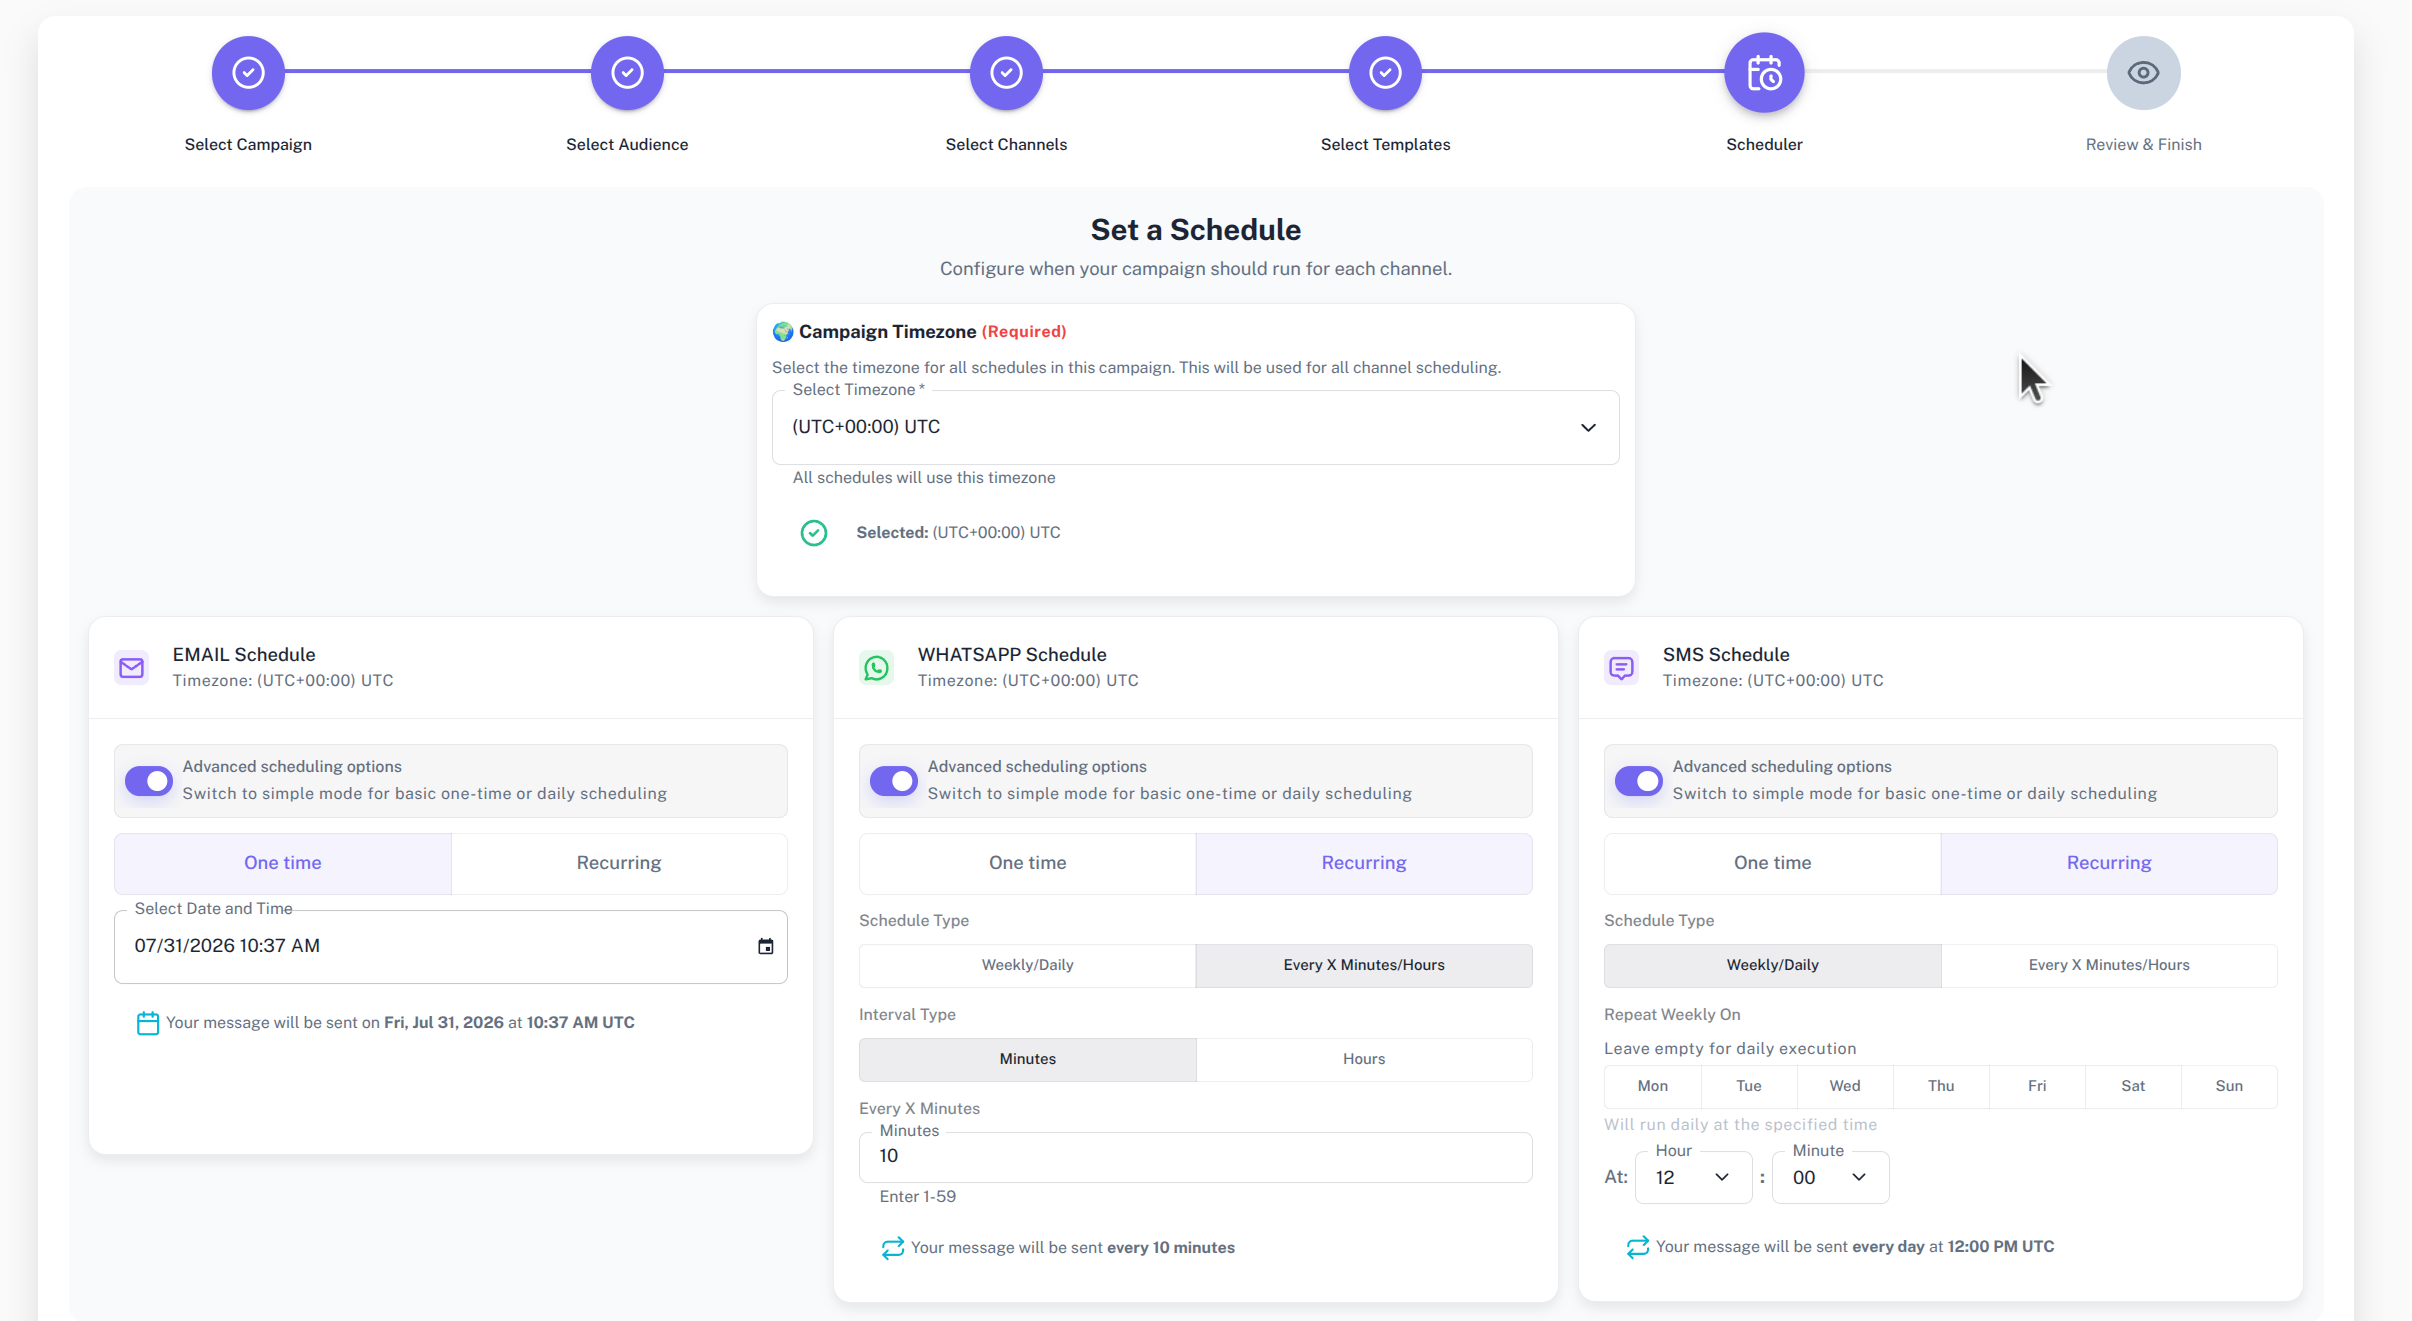
Simple mode supports:
- Send once with Select Date and Time.
- Repeat with Select Time for daily delivery.
Turn on Advanced scheduling options when you need more control.
Advanced mode supports:
- One time delivery.
- Recurring delivery.
- Weekly/Daily schedules.
- Every X Minutes/Hours interval schedules.
- Day selection with Mon, Tue, Wed, Thu, Fri, Sat, and Sun.
When no weekly days are selected for a weekly/daily recurring schedule, the schedule runs daily at the selected time.
Step 6: Review and launch
Use Review & Finish to confirm the complete campaign setup.
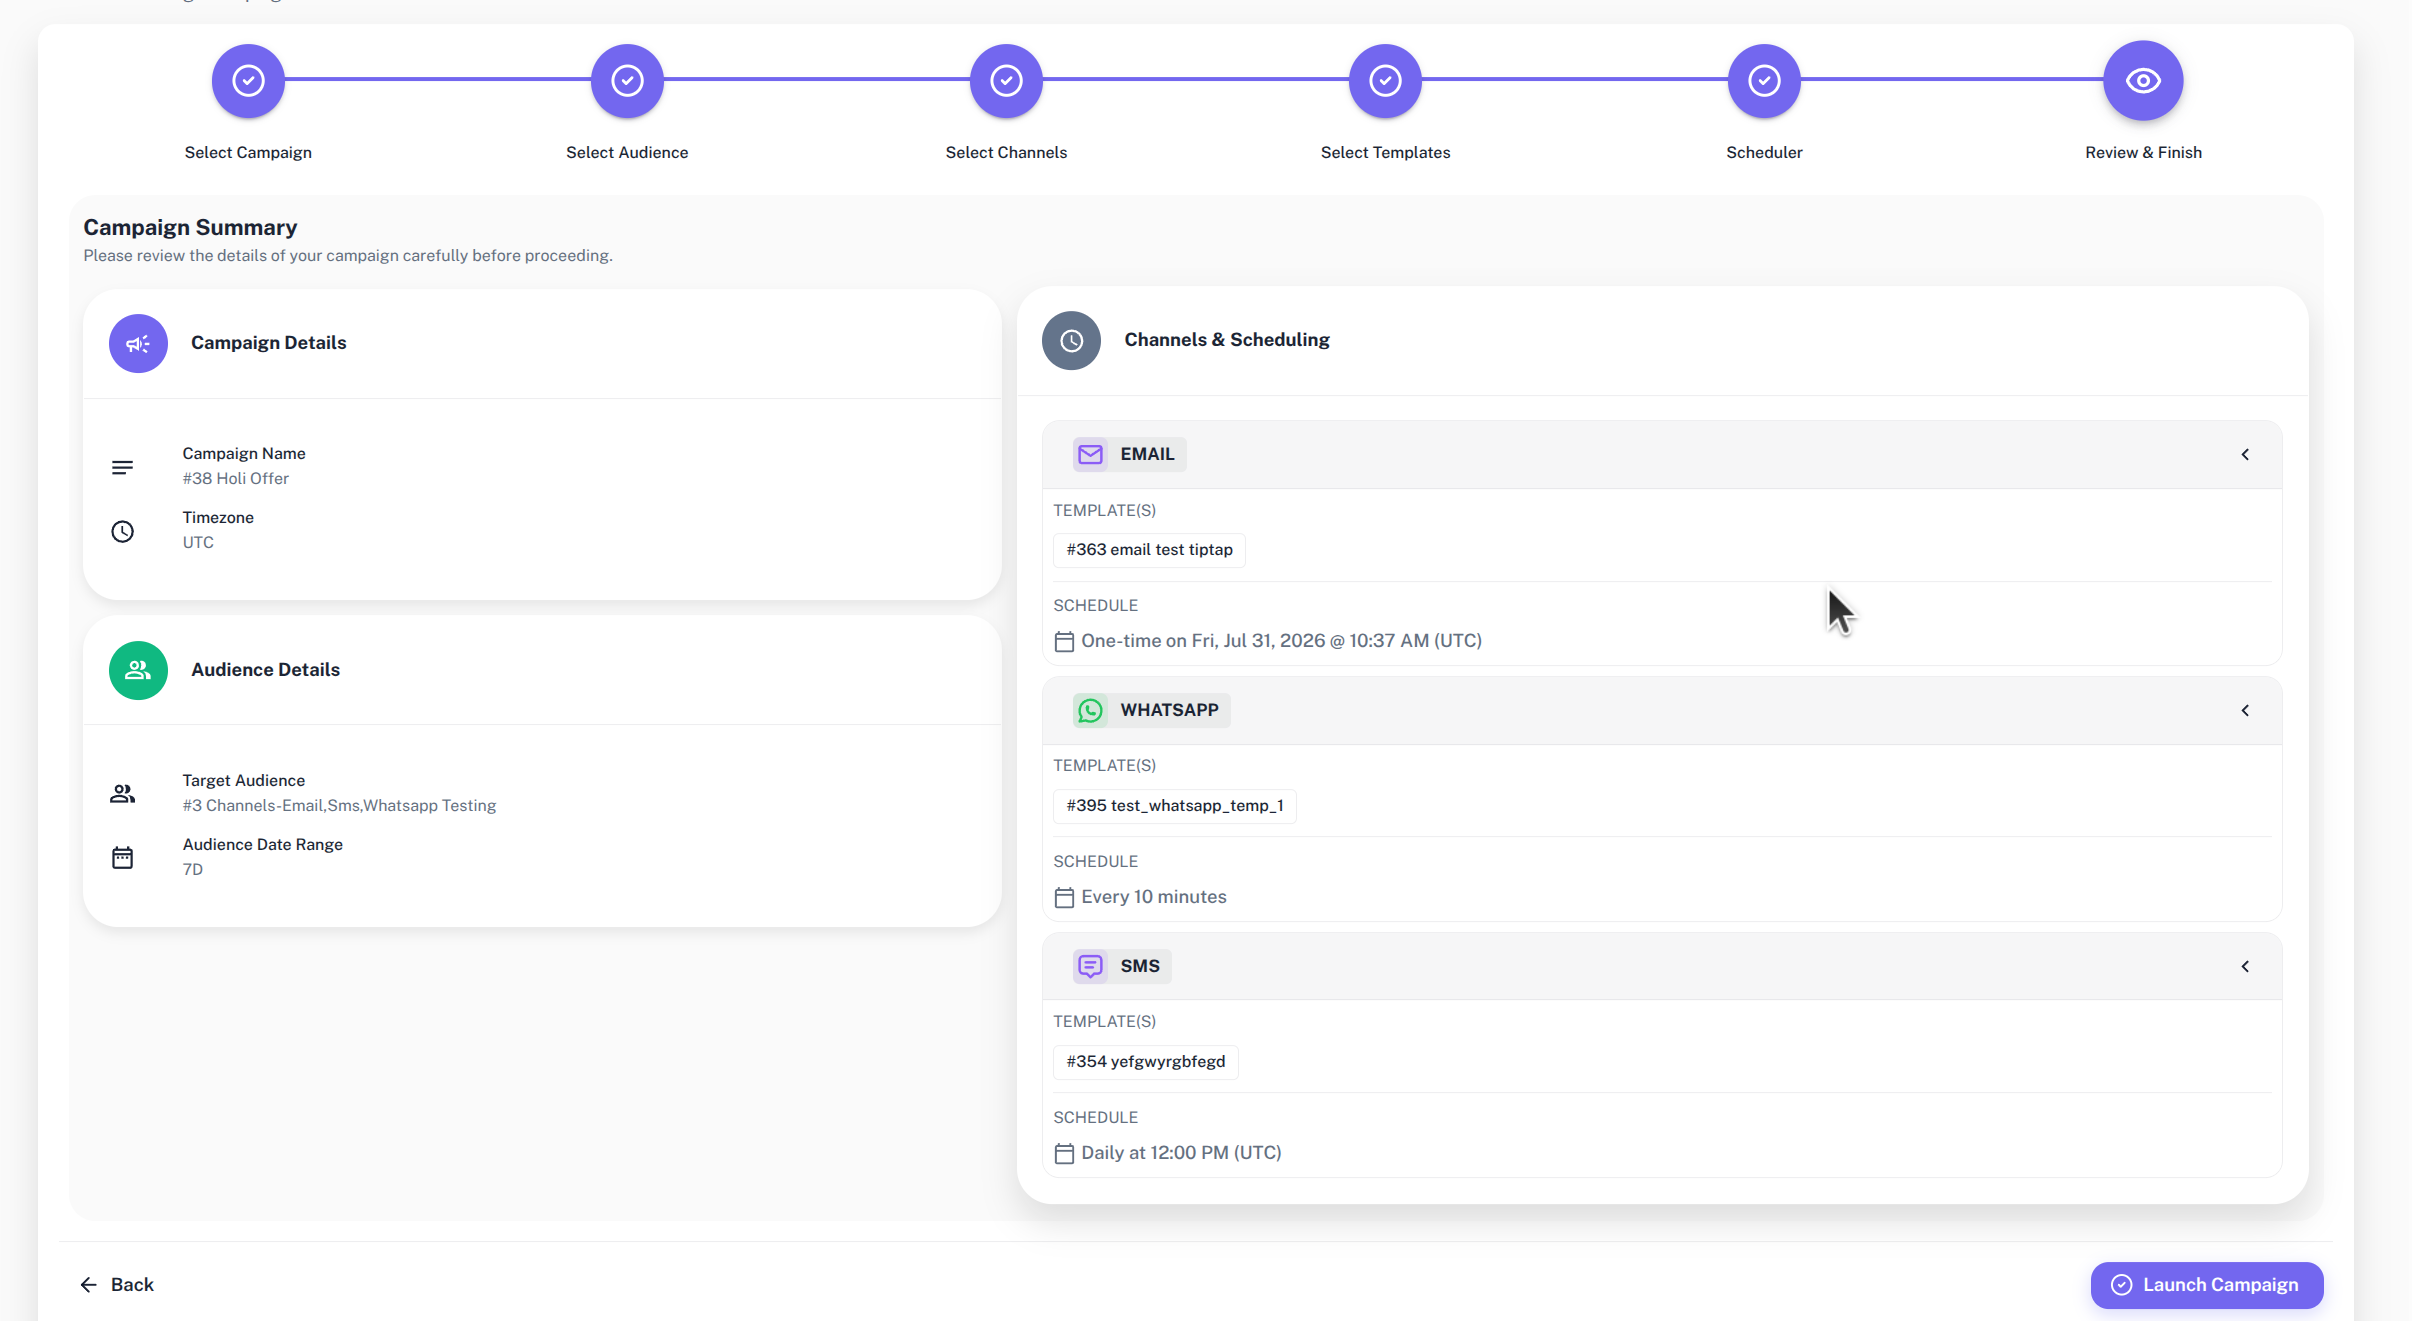
Review:
- Campaign Name.
- Timezone.
- Target Audience.
- Audience Date Range.
- Selected channels.
- Templates for each channel.
- Schedule for each channel.
Select Launch Campaign when the campaign is ready. DriveMetaData sends the scheduled campaign setup to the backend. On success, you return to Campaign Schedule.
Launch can affect live customer communication. Do not launch until audience, templates, timezone, schedules, suppression, and measurement are reviewed.
QA checklist
Before selecting Launch Campaign, confirm:
- Campaign name and description are clear.
- App stream is correct if a new campaign was created.
- Audience and date range match the campaign goal.
- Every selected channel is intentional.
- Every selected channel has at least one template.
- A/B tests have at least two filled variations.
- Template previews match the intended message.
- Timezone is correct.
- Every selected channel has a valid schedule.
- One-time schedules use the intended date and time.
- Recurring schedules match the intended cadence.
- Consent, suppression, and eligibility rules are reviewed.
- Success metric is defined.
Common issues
| Issue | Cause | Fix |
|---|---|---|
| Next is disabled on Select Campaign | No campaign is selected | Select a campaign card or create and select a new campaign |
| Campaign cannot be created | Campaign name or App stream is missing | Enter Campaign Name and select App stream |
| Audience step cannot continue | Audience or date range is missing | Select a date range and audience |
| Channel step cannot continue | No channel is selected | Select at least one channel |
| Template step cannot continue | A selected channel has no template | Choose a template for every selected channel |
| A/B test cannot continue | Fewer than two filled variations are selected | Select both Variation A and Variation B |
| Scheduler controls are unavailable | Timezone is not selected | Select Campaign Timezone first |
| Schedule step cannot continue | One or more selected channels have no valid schedule | Configure every selected channel |
| Analytics warning appears | Analytics data is unavailable for the selected context | Continue setup if the audience, channel, or template choice is already approved |
| Launch fails | Backend validation rejected the scheduled campaign | Review the error message, required fields, templates, schedules, and timezone |
Suggested screenshots to add later
Add screenshots when the image files are available:
- Campaign Scheduler stepper.
- Select Campaign step.
- Create a New Campaign dialog.
- Select Target Audience table and preview modal.
- Select Your Channels cards.
- Select Templates with A/B Test enabled.
- Scheduler timezone and channel schedule controls.
- Review & Finish summary.